Food photography 101: Using utensils and tools as props

- Share via
This is part of a series of posts on food photography, sharing some of the tips and tricks we use here at The Times. We received a number of great questions from readers, which we will answer in upcoming posts.
One of the more frequent questions I receive is how we make food look appealing and appetizing. There are a lot of ways to manipulate both the food and the viewer’s eye. It really depends on the dish itself and what we are trying to convey. Often, we rely on props.
In the photo gallery above, I include shots from various Food stories, each using tools or utensils as props to bring energy or action to a shot, and/or to draw the eye to some aspect of a dish we want the viewer to notice. Click on the captions for more details and links to the related story or recipe. And continue reading below for some general tips.
I like to tell people that shooting food is both incredibly easy and a real pain. Food is easy in that it never complains; unlike a model, food will sit still forever until you get the shot. Of course, that’s also what makes it such a pain -- food just sits there. You can’t tell it to freshen up or slather on the charm. And you certainly can’t tell it to look tasty.
So it’s up to the photographer and stylist to bring the food to life, to make the viewer want to eat a particular dish (or at least want to try the recipe). In addition to lighting and angle and composition of the dish, we frequently rely on props.
Some of my favorite props are tools -- perhaps it’s a utensil used to serve the dish, or maybe it’s one of the tools used in the dish’s creation. Depending on the recipe and what we’re trying to convey about the story, these props can serve a number of functions:
Bring action and energy to the shot: Props are really helpful when shooting a dish that might be considered “flat” or “dull,” lacking in color and/or texture. In the gallery above, you can see how a carving knife gives some life to a shot of smoked pork belly, the knife revealing the moist tenderness of the meat under the smoky brown surface. Likewise, the fondue above looks much more appetizing when you can see the rich cheese oozing off the chunk of bread. And nothing helps a shot of a grilled summer dish like tongs moving it off the grill rack.
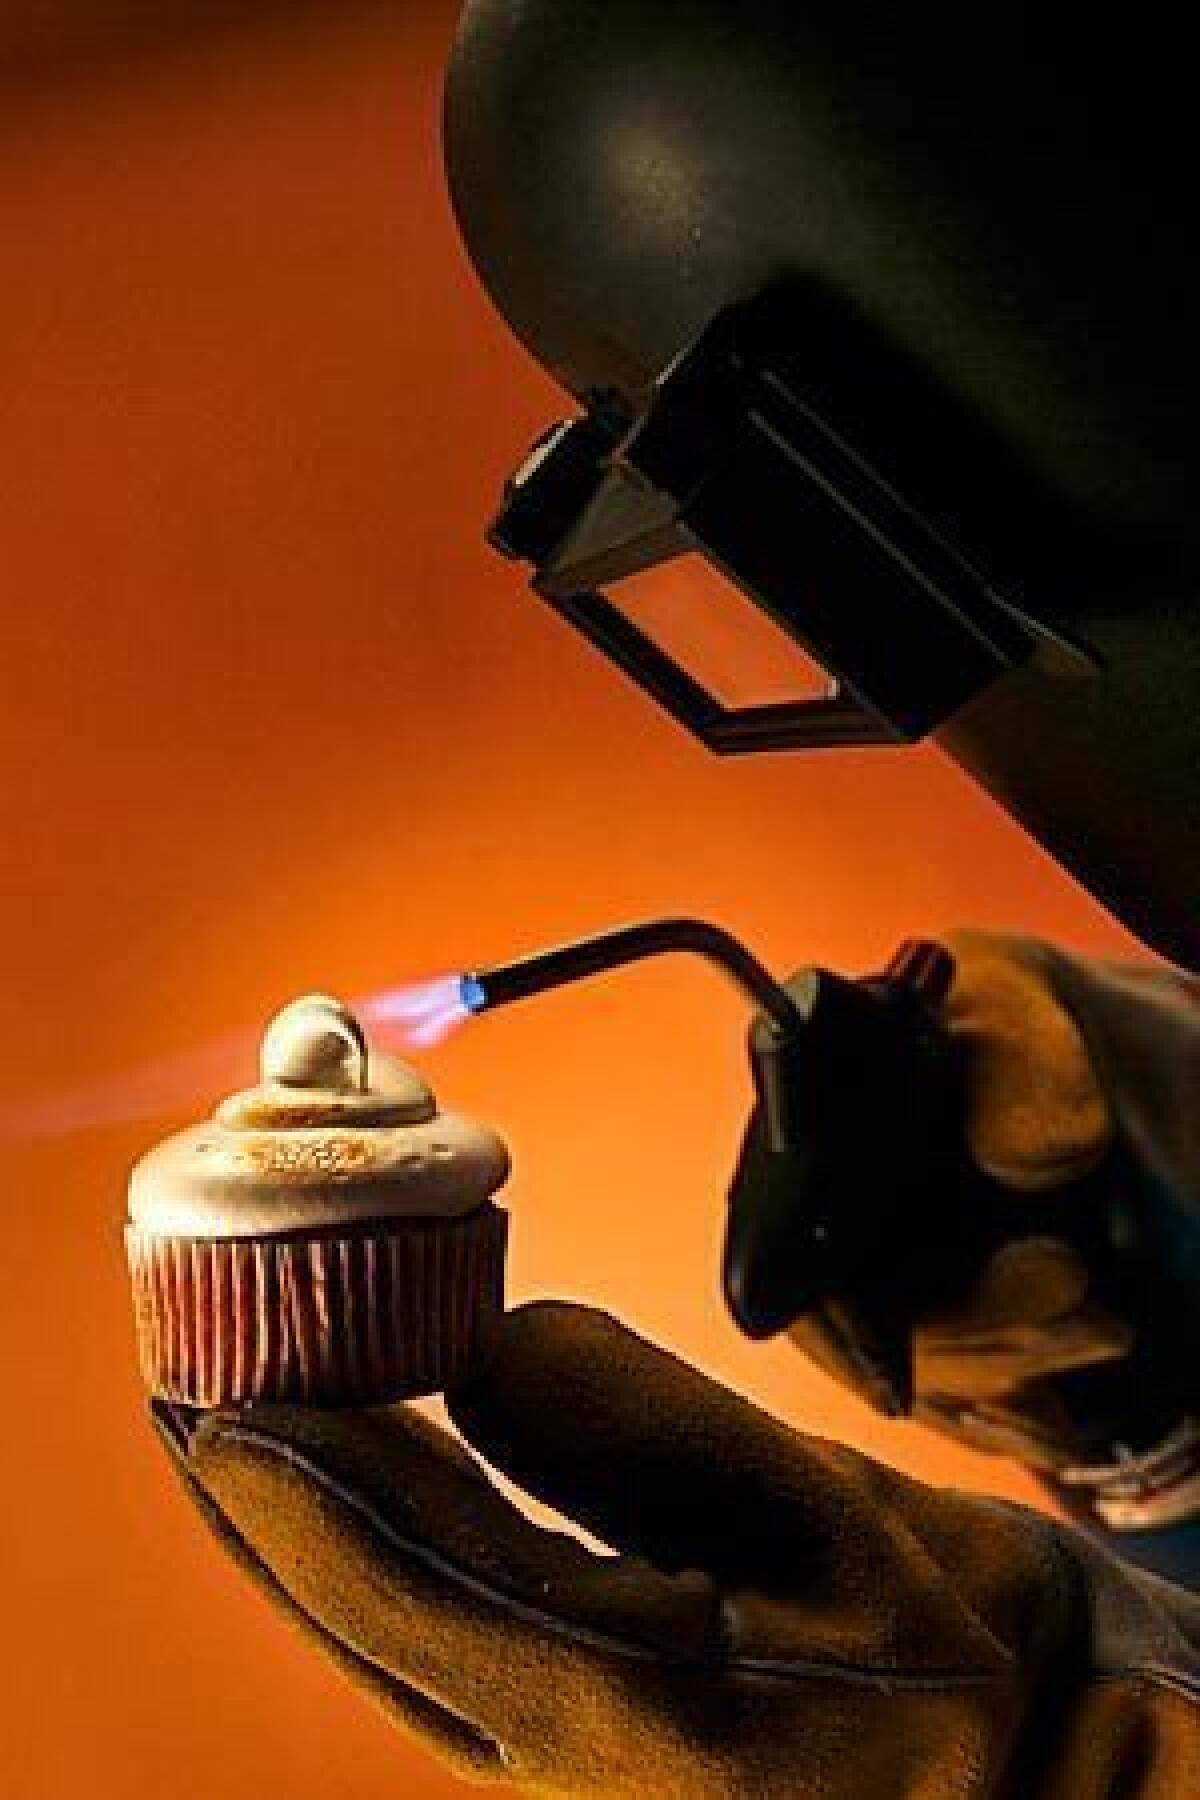
Illustrate a technique: Props are great for visually explaining a method. In the first shot above, a blowtorch is taken to a s’mores cupcake to brulee the topping. This particular photo was shot to be the cover image for a story on using a blowtorch in the kitchen; not only does it convey the technique, but adding the welder’s mask and gloves adds a little levity and energy to the shot. Same with the shot of the roasted spiny lobsters. The shot was for a story on salt roasting, but rather than show the lobsters under a boring mound of salt, or fully cleaned and plated on a serving platter, we wanted to show the recipe in progress as the salt is brushed off the freshly roasted meal.
Focus the viewer’s eye: Tools are an easy way to train the viewer’s eye on a particular detail without it being obvious. A tight shot of a forkful of curried hash focuses the viewer on the chunks of apple and pork. And for a story we did on zabaglione, nothing illustrates the light and airy texture of the custard quite like training the camera on a ladle spooning the delicate dessert over gingerbread.
Questions or suggestions? Food photography challenge? Comment below or email Noelle Carter at [email protected].
ALSO:
Go behind the scenes at the Test Kitchen
134 recipes for your favorite restaurant dishes
Browse hundreds of recipes from the L.A. Times Test Kitchen
You can find Noelle Carter on Facebook, Google+, Twitter and Pinterest.
More to Read
Eat your way across L.A.
Get our weekly Tasting Notes newsletter for reviews, news and more.
You may occasionally receive promotional content from the Los Angeles Times.


